

Role: MS Product Design and Manufacturing, Boston University
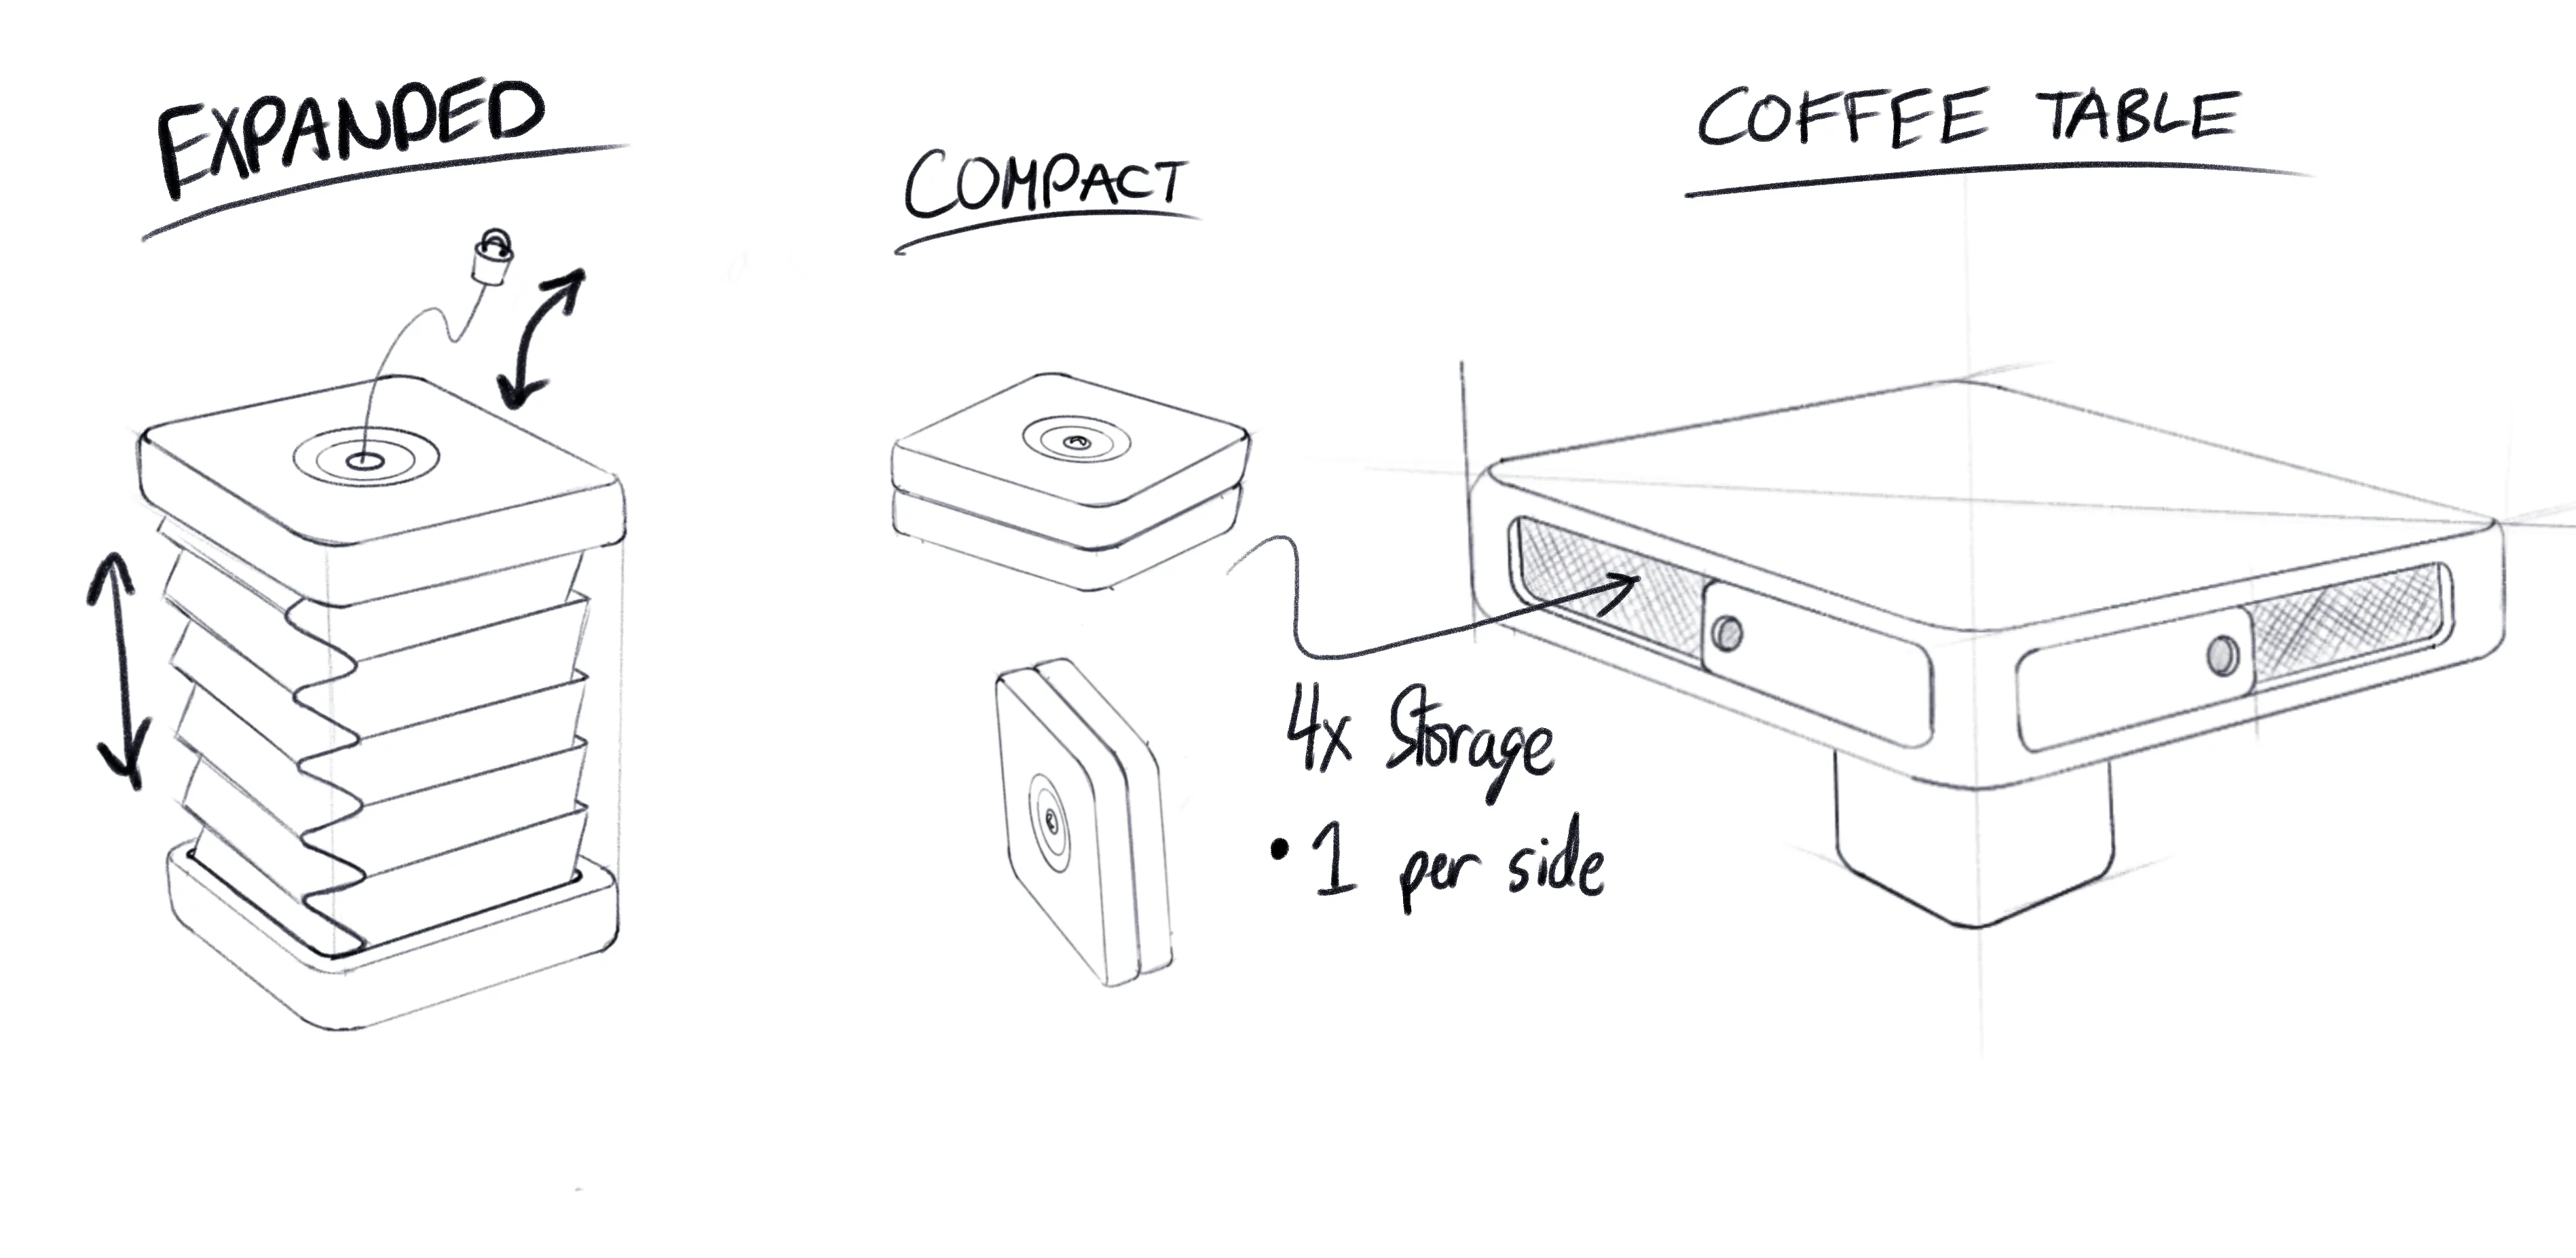
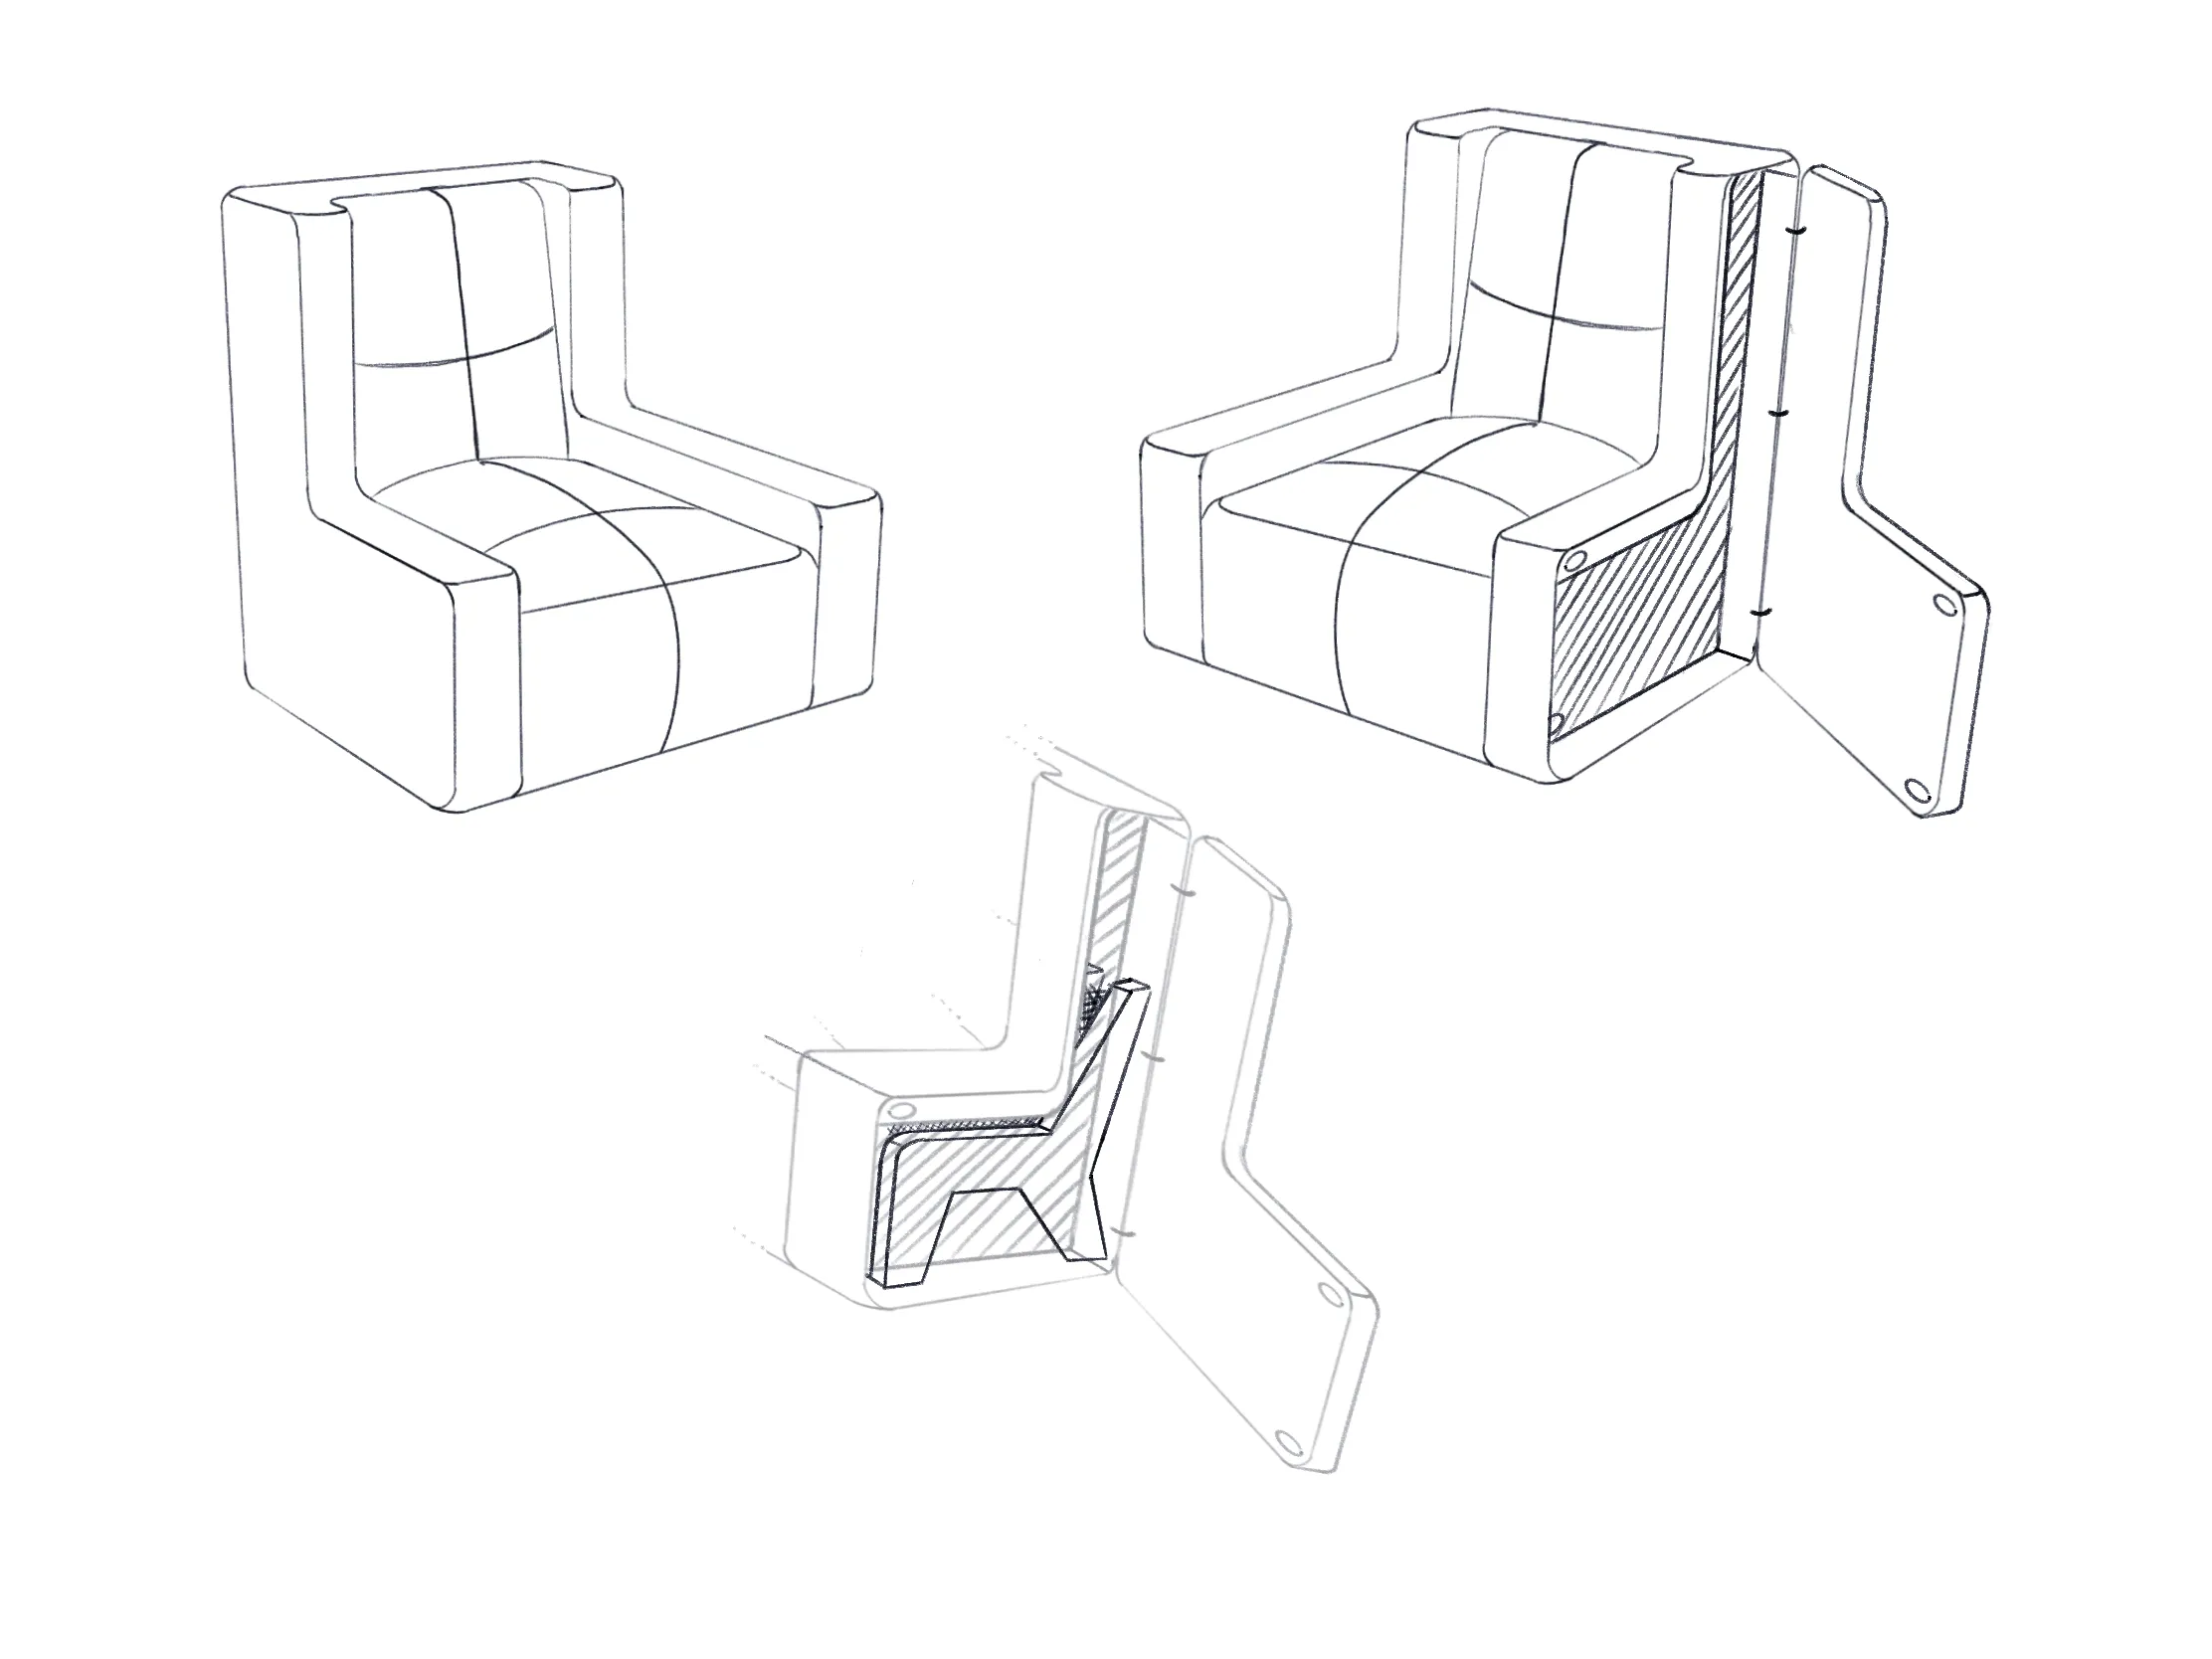
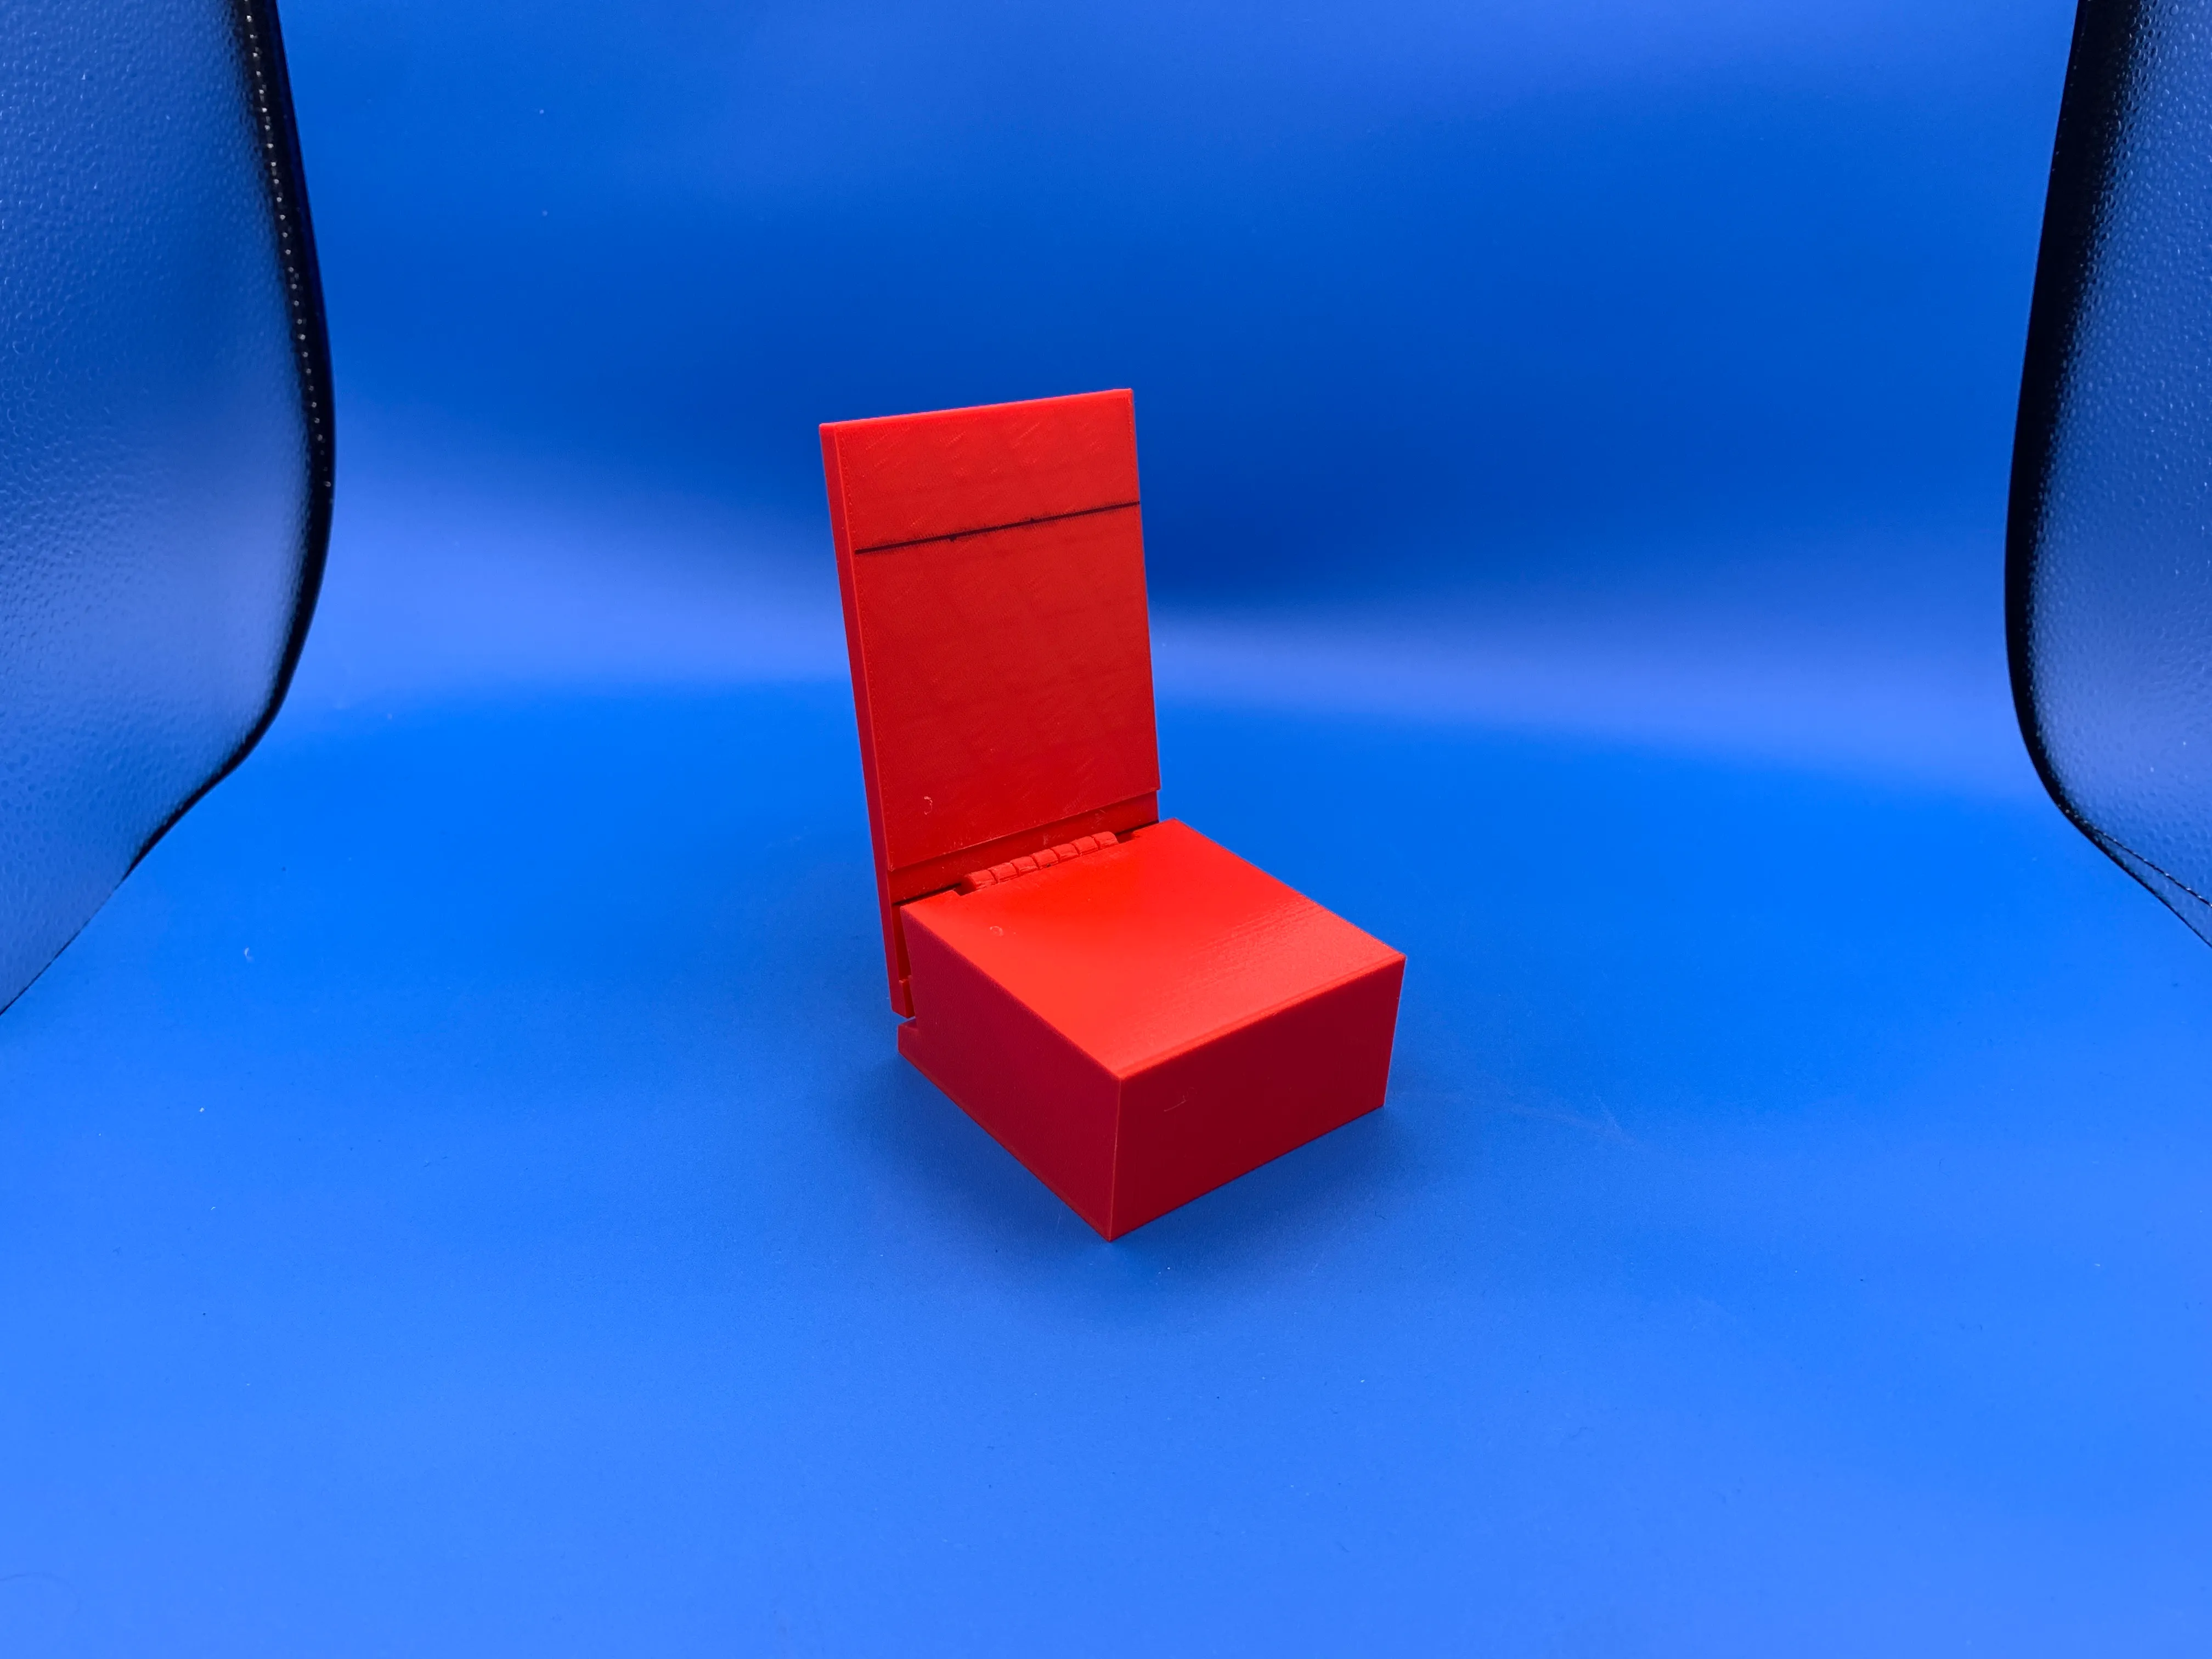
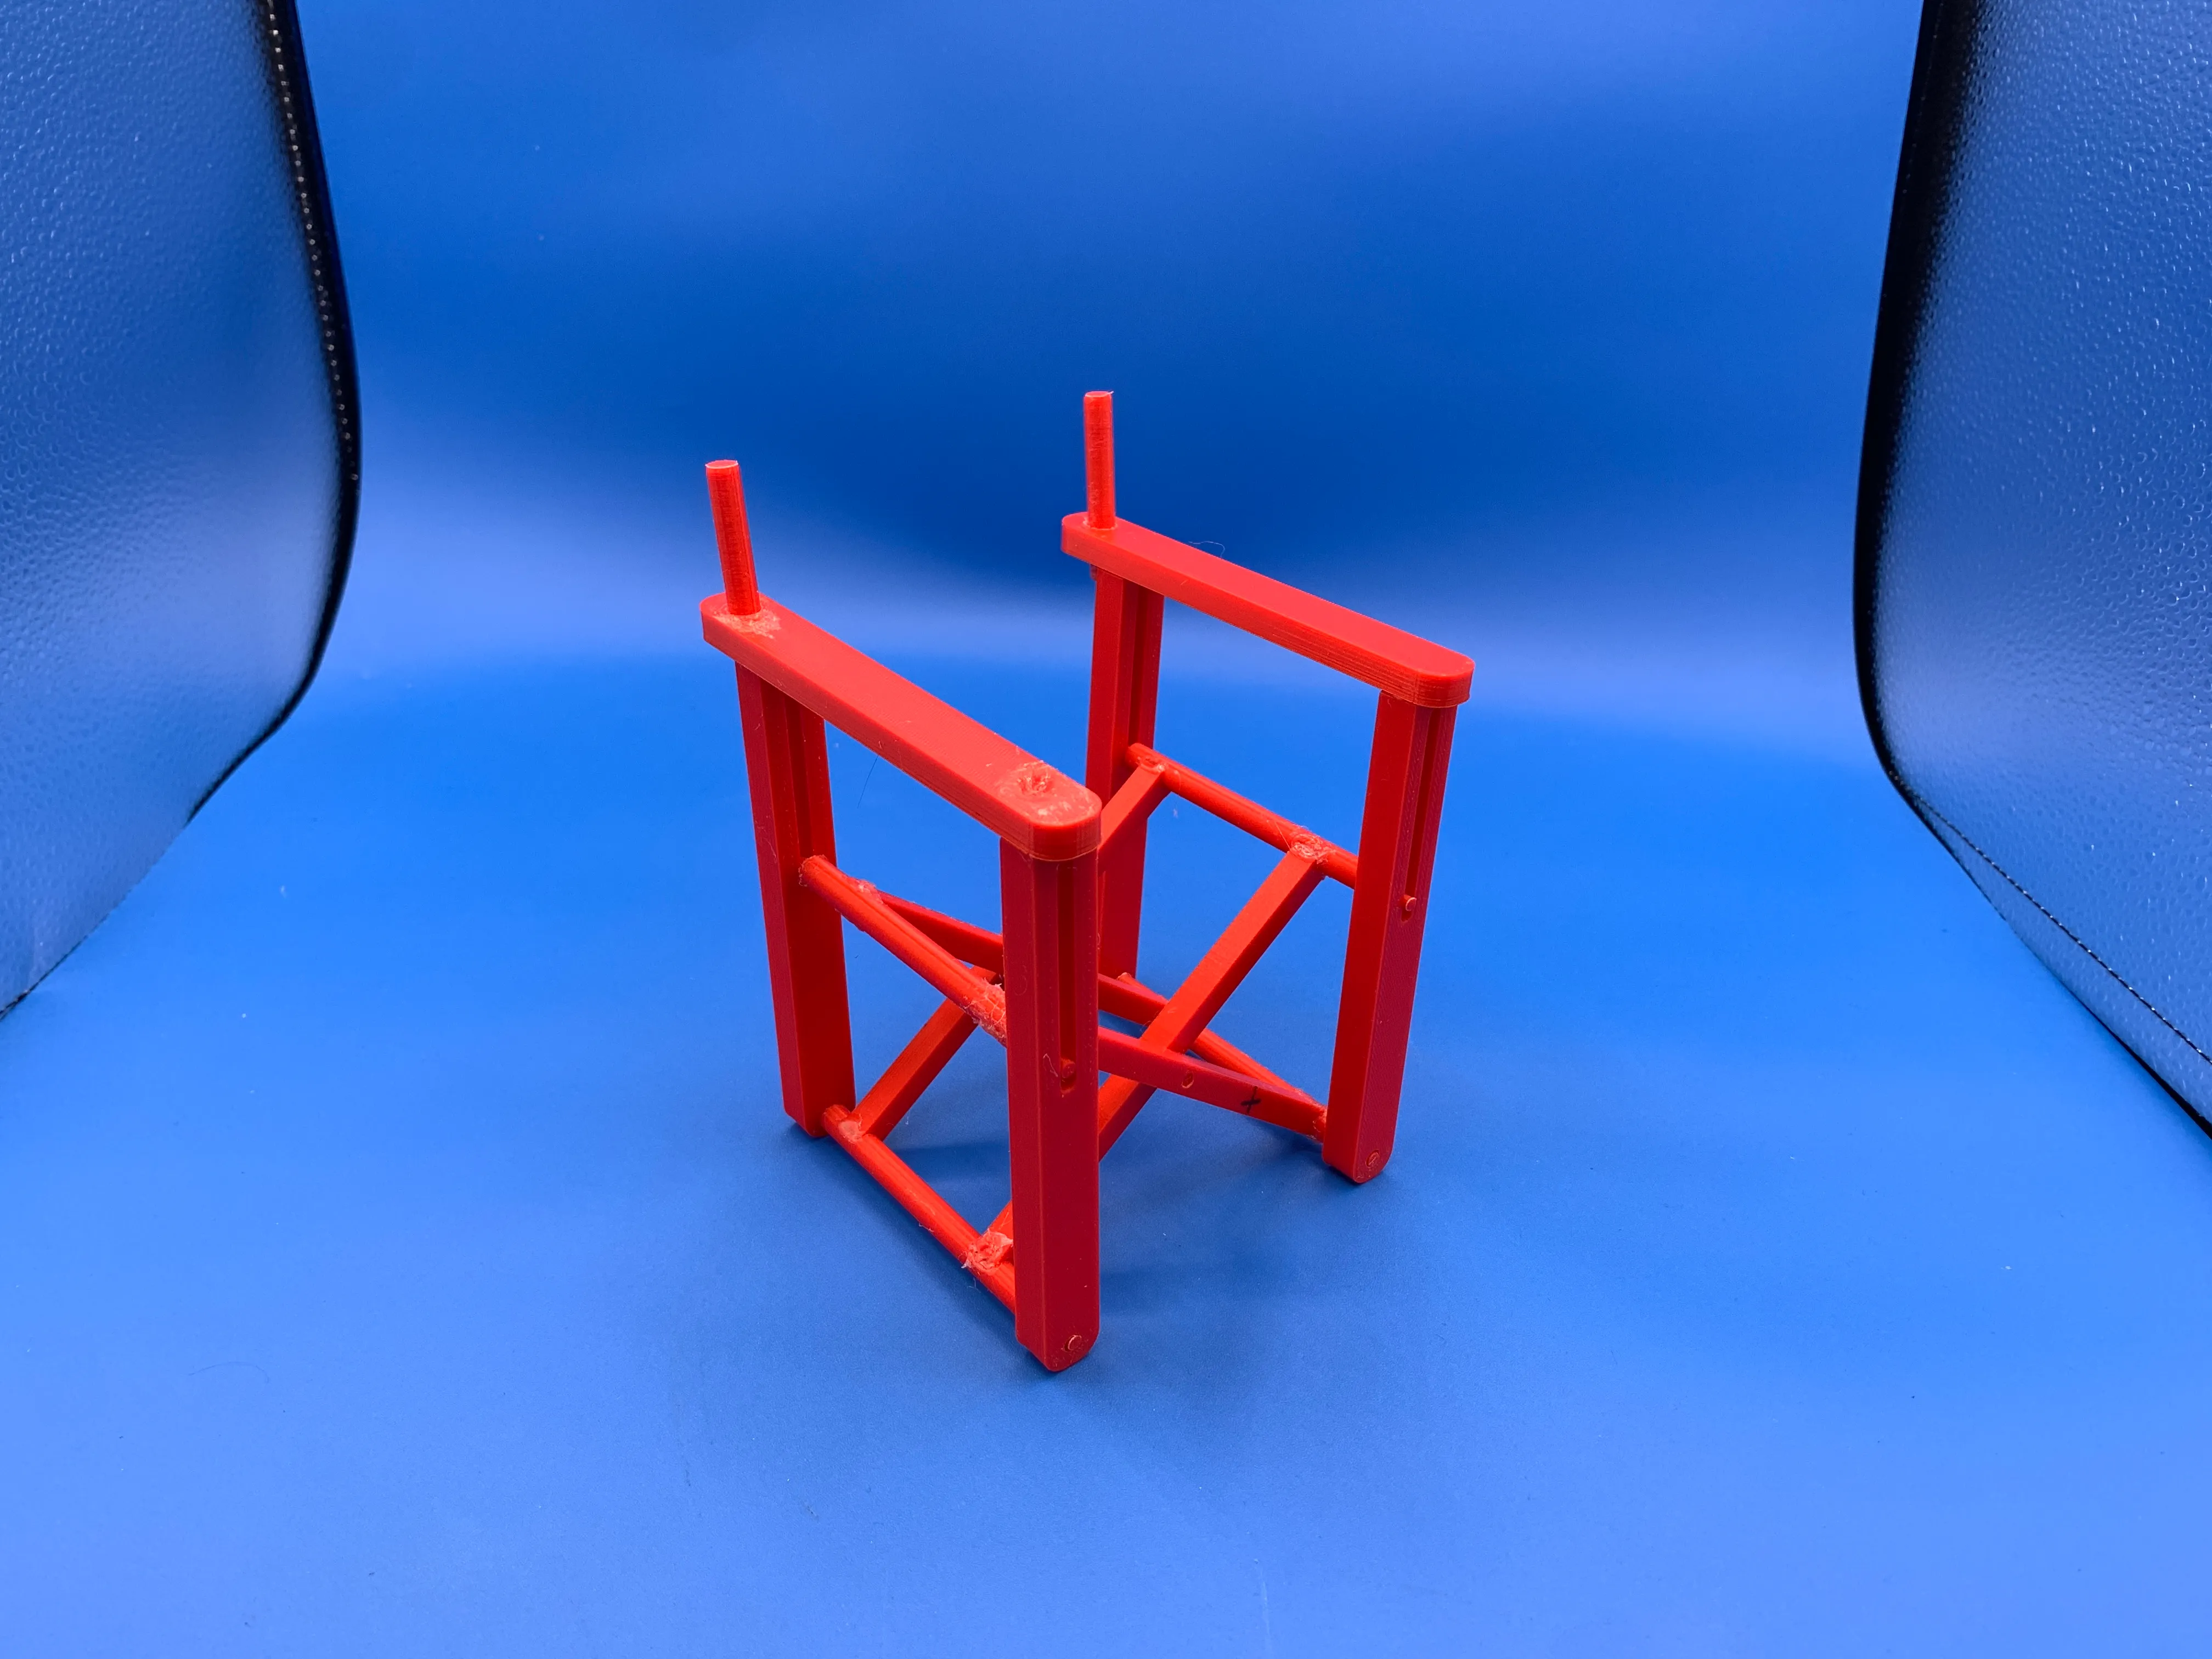
This is an ongoing project and will continue into the next semester. The goal is to ideate, design and develop a fully-fledged product from start to finish. The project roadmap started with unconstrained ideation, leading into down selection, customer surveys, data analysis, refined product concepts, creation of MRD and PRD documentation, physical mockups, and high-level CAD.
At the moment, we are deciding on our final concept with the use of both sketching and high-level CAD models. We will soon be moving into detailed CAD models, material and manufacturing choices, manufacturing drawings, bill of materials, and assembly instructions/SOP.
This project involves a lot of information and pictures; more than would feel comfortable in this popup. I highly encourage clicking the button below to see more!


Role: MS Product Design and Manufacturing, Boston University
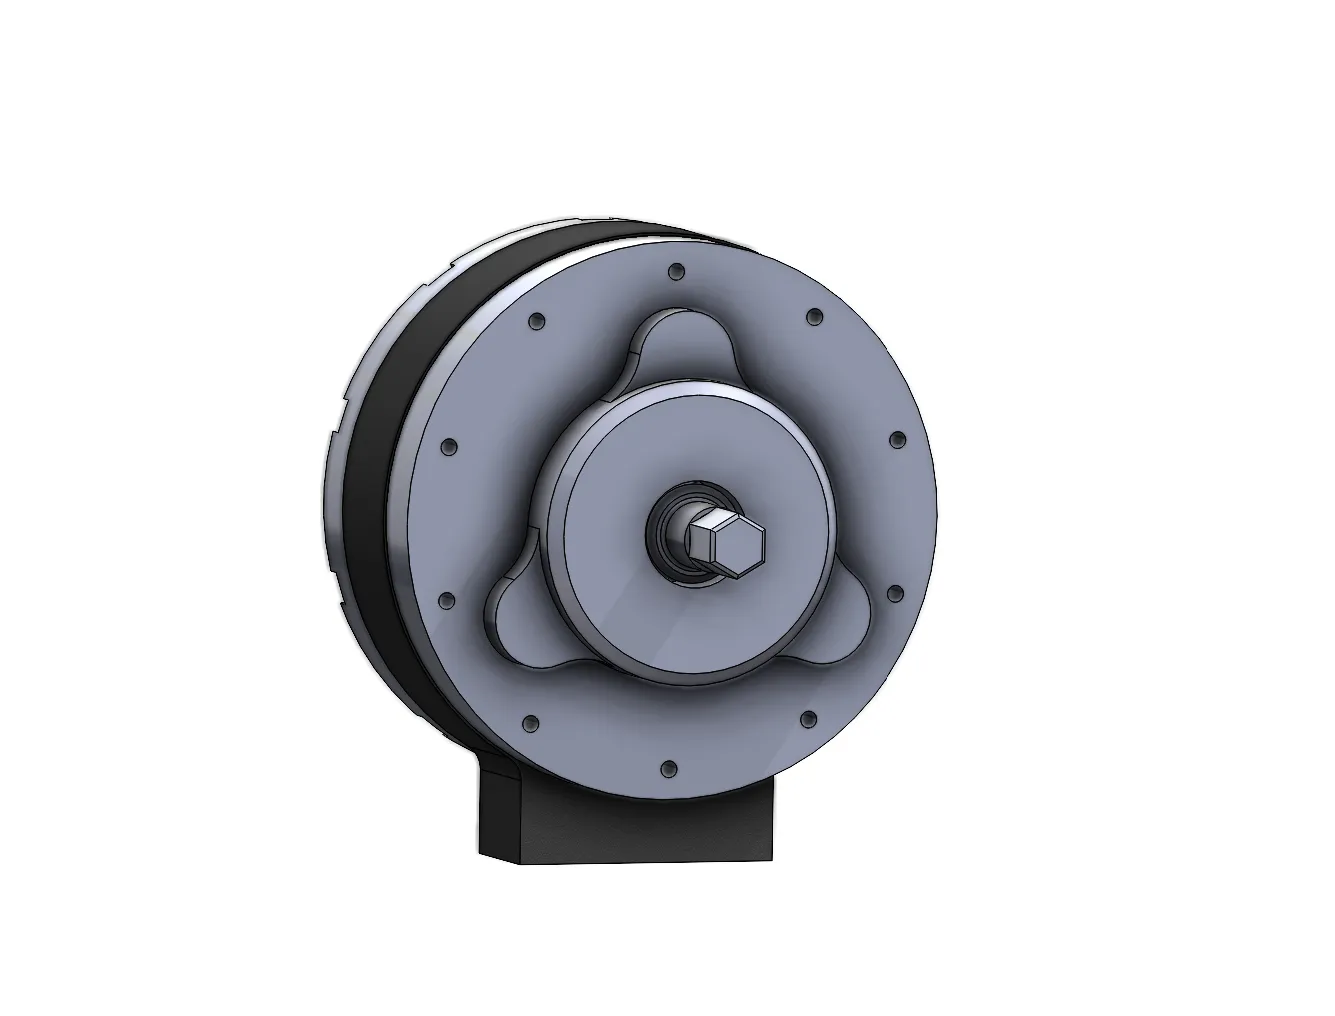
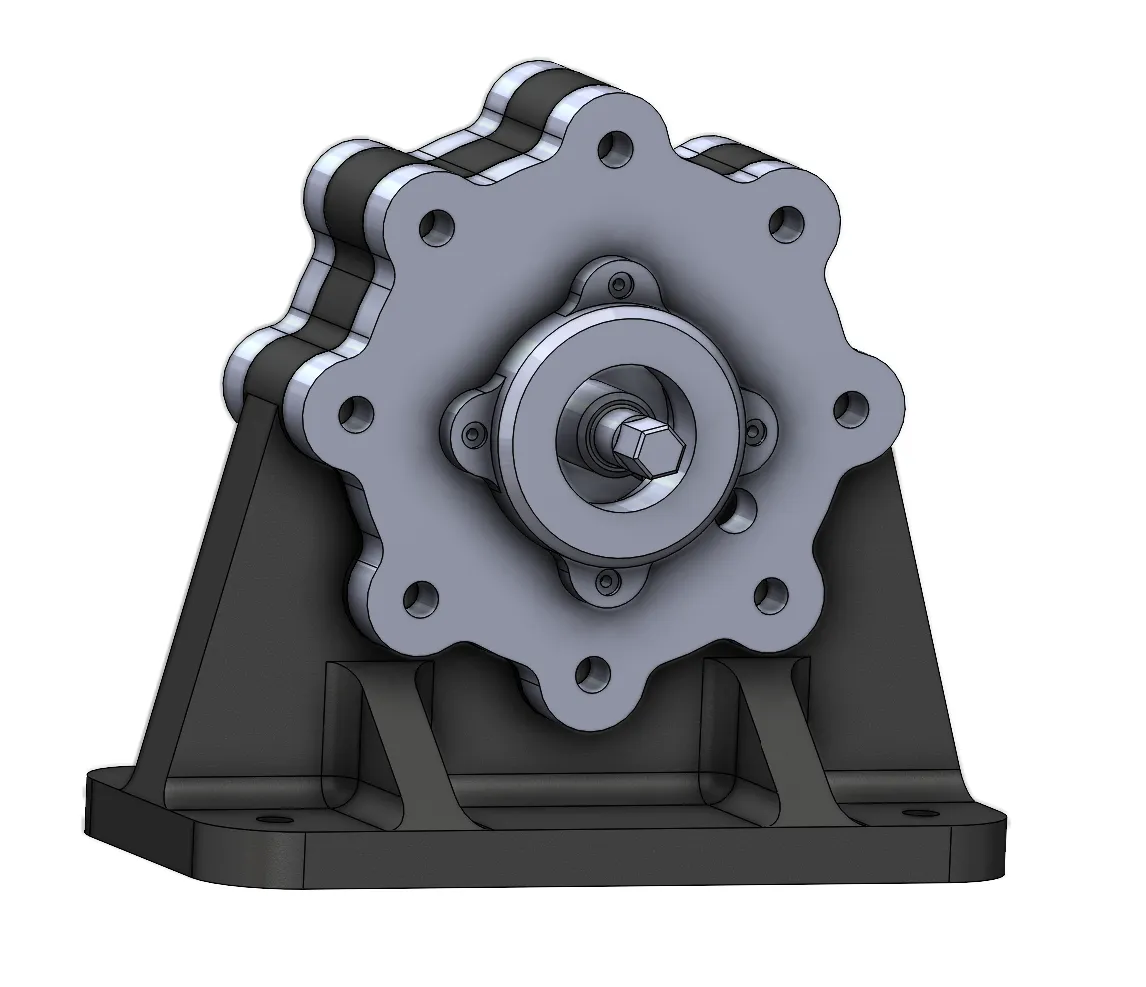
This project is one part of a manufacturing focused course taught by Steve Chomyszak. The first half of this course has been focused on building a rotary vane pump, for which the drawings have been provided, using the machinery at the Engineering Production Innovation Center (EPIC) at Boston University. The importance here is to learn manufacturing techniques with a hands-on approach, and to gain an appreciation for what it means to design something to be manufactured (DFMA).
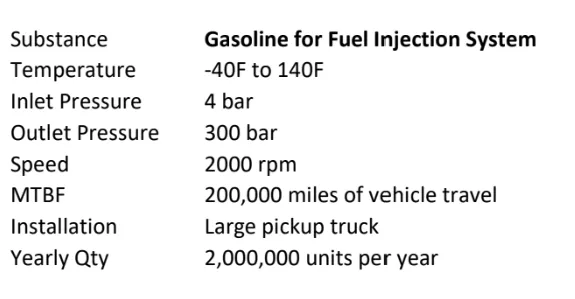
The second half of this course is to redesign this pump as part of a team. This pump was intended to pump water, but will instead need to pump gasoline at specific conditions. I have taken a lead role on the team to find and employ the necessary calculations, and materials, to redesign the pump. Some of the calculations include hoop stress, stress and deflection of the vane, fatigue life, bolt torque, bearing loads, and thermal expansion. On the materials side, many of the calculations have been used to provide guidelines for material selection with the use of Granta Edupack software. We have decided on White cast iron, low alloy, EN GJN HV350 for the pump housing, and blackheart malleable cast iron, EN GJMB 350-10 for the rotor vanes with a PEEK insert at the tip.
Material and hardware selection are critical to this project due to the volume of pumps (2,000,000) that are produced over a year. With bolt selection, I compared two different hardware groups for the main housing bolts. I found that by choosing flanged bolts and nuts, instead of purchasing standard bolts, nuts, and washers, we would save over $3.5 million on our yearly budget.

Role: Summer Metalworking Couse, Massachusetts College of Art and Design
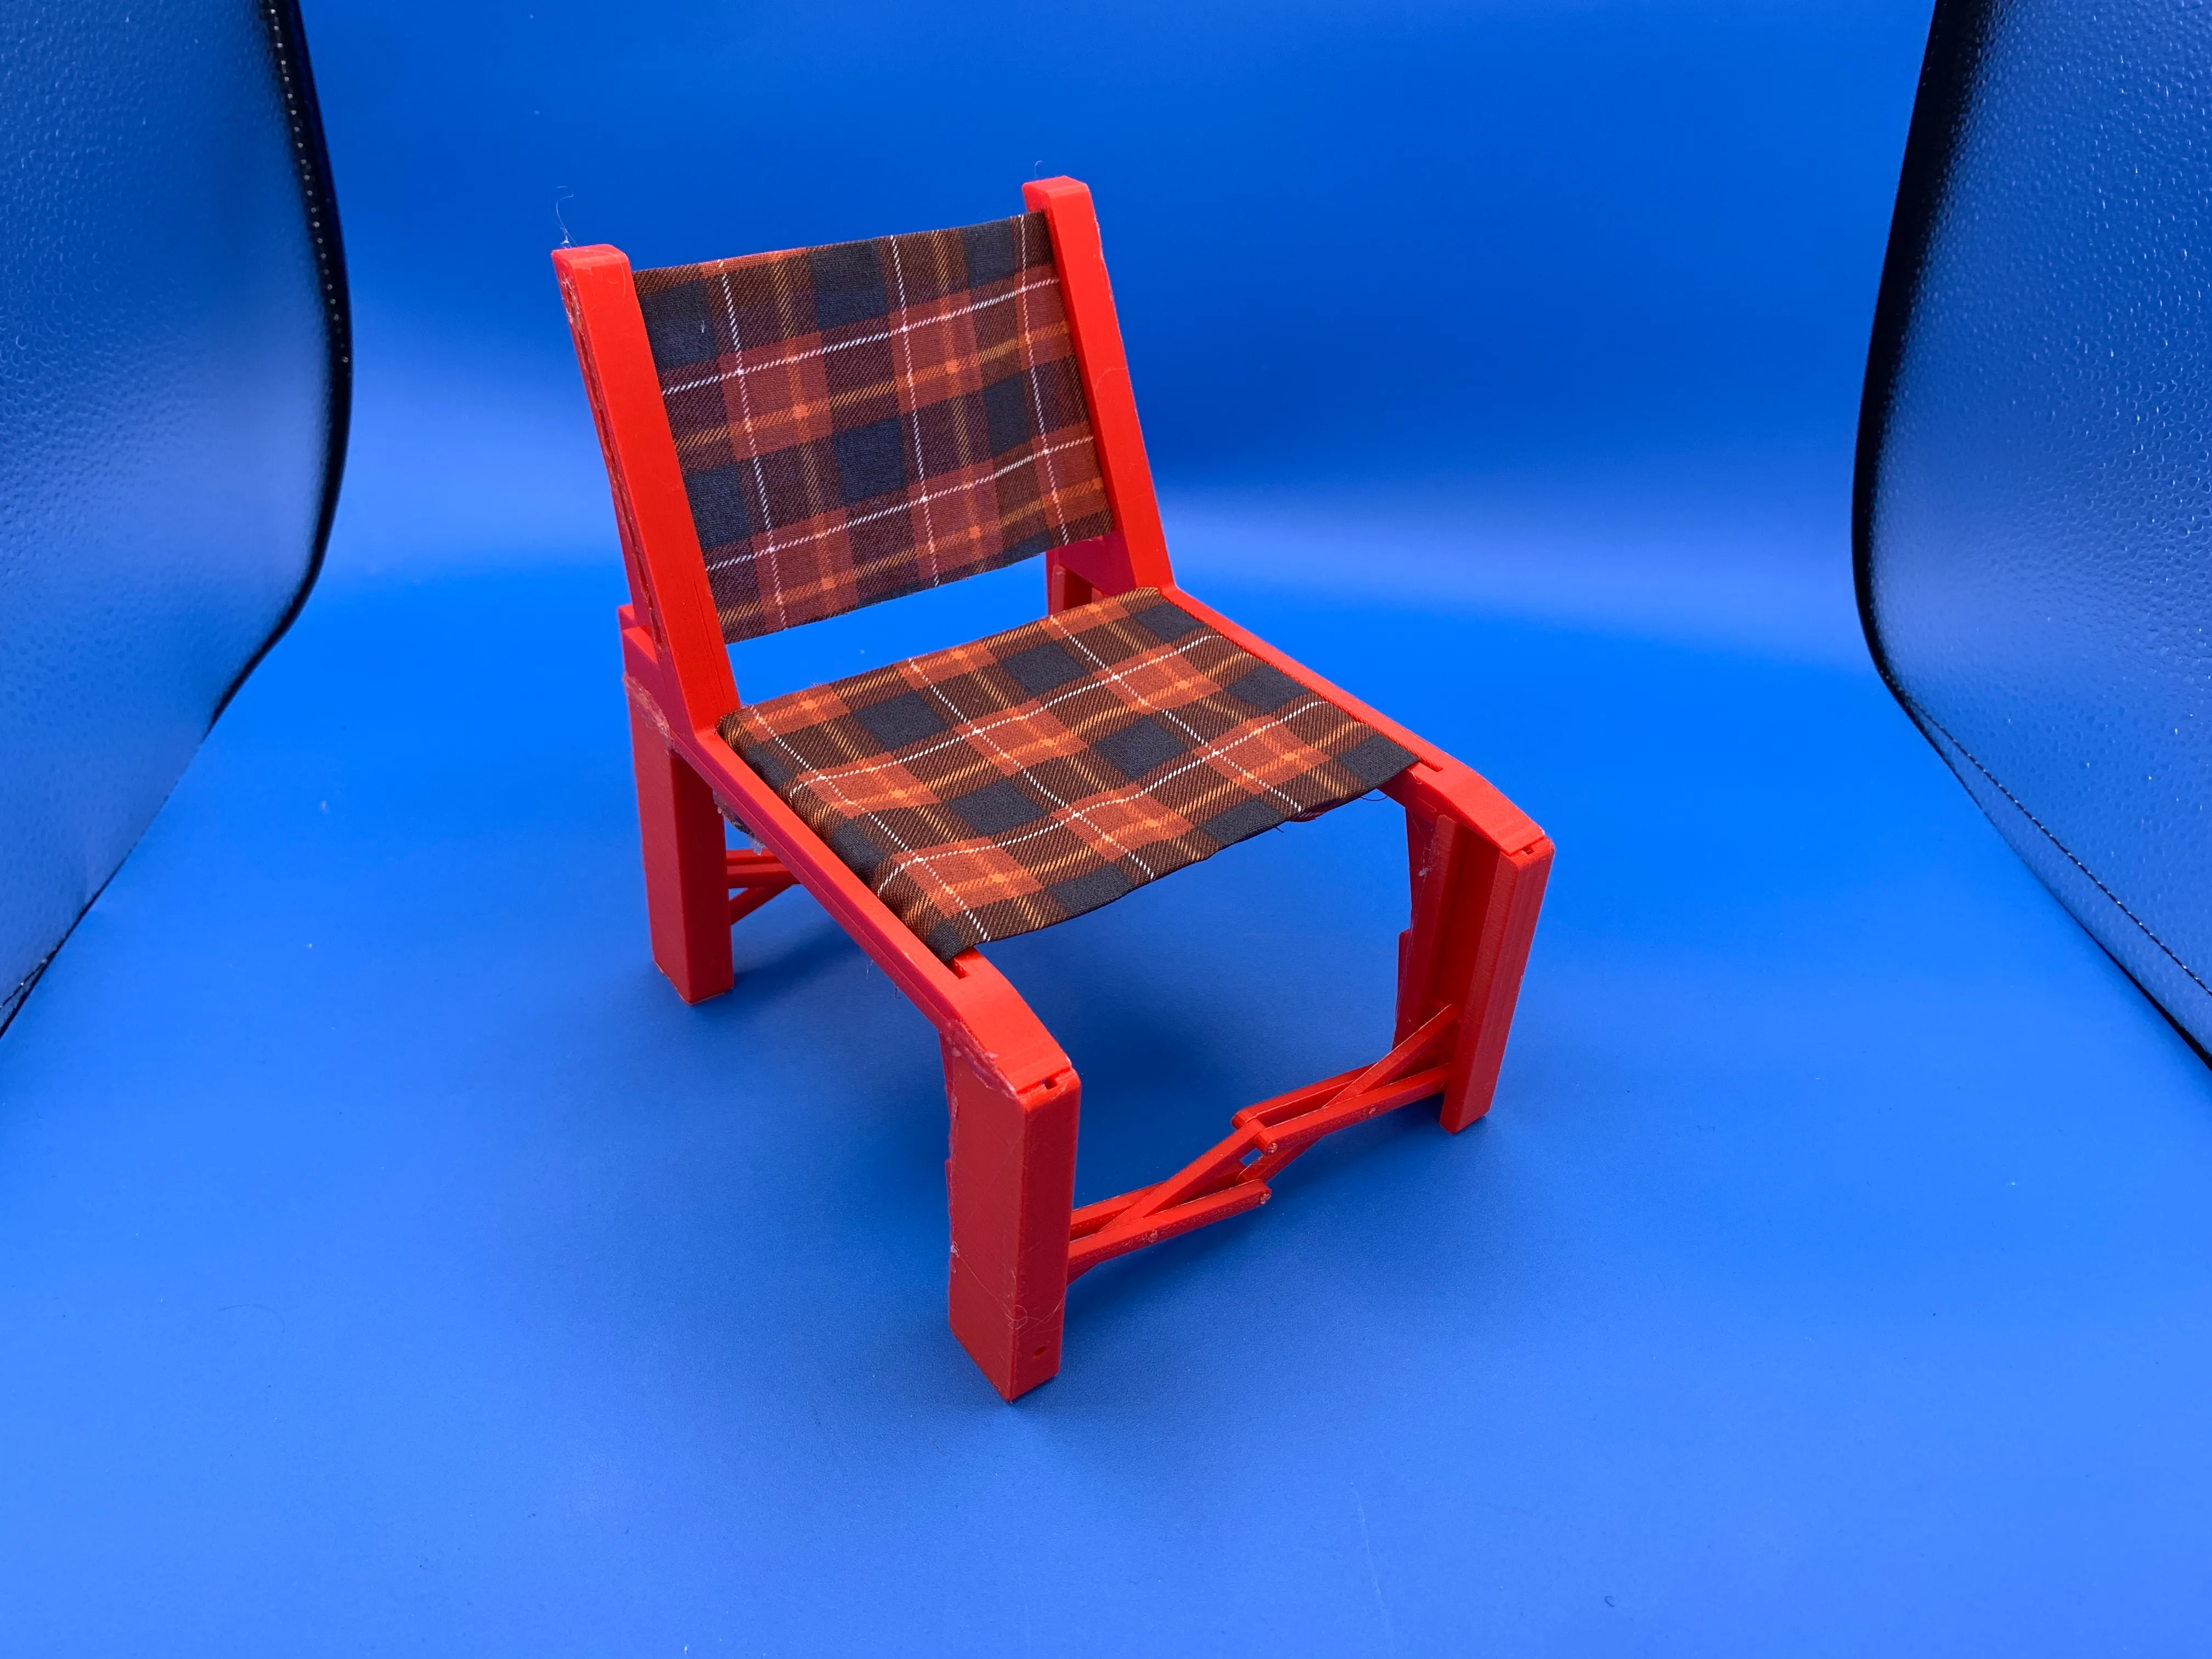
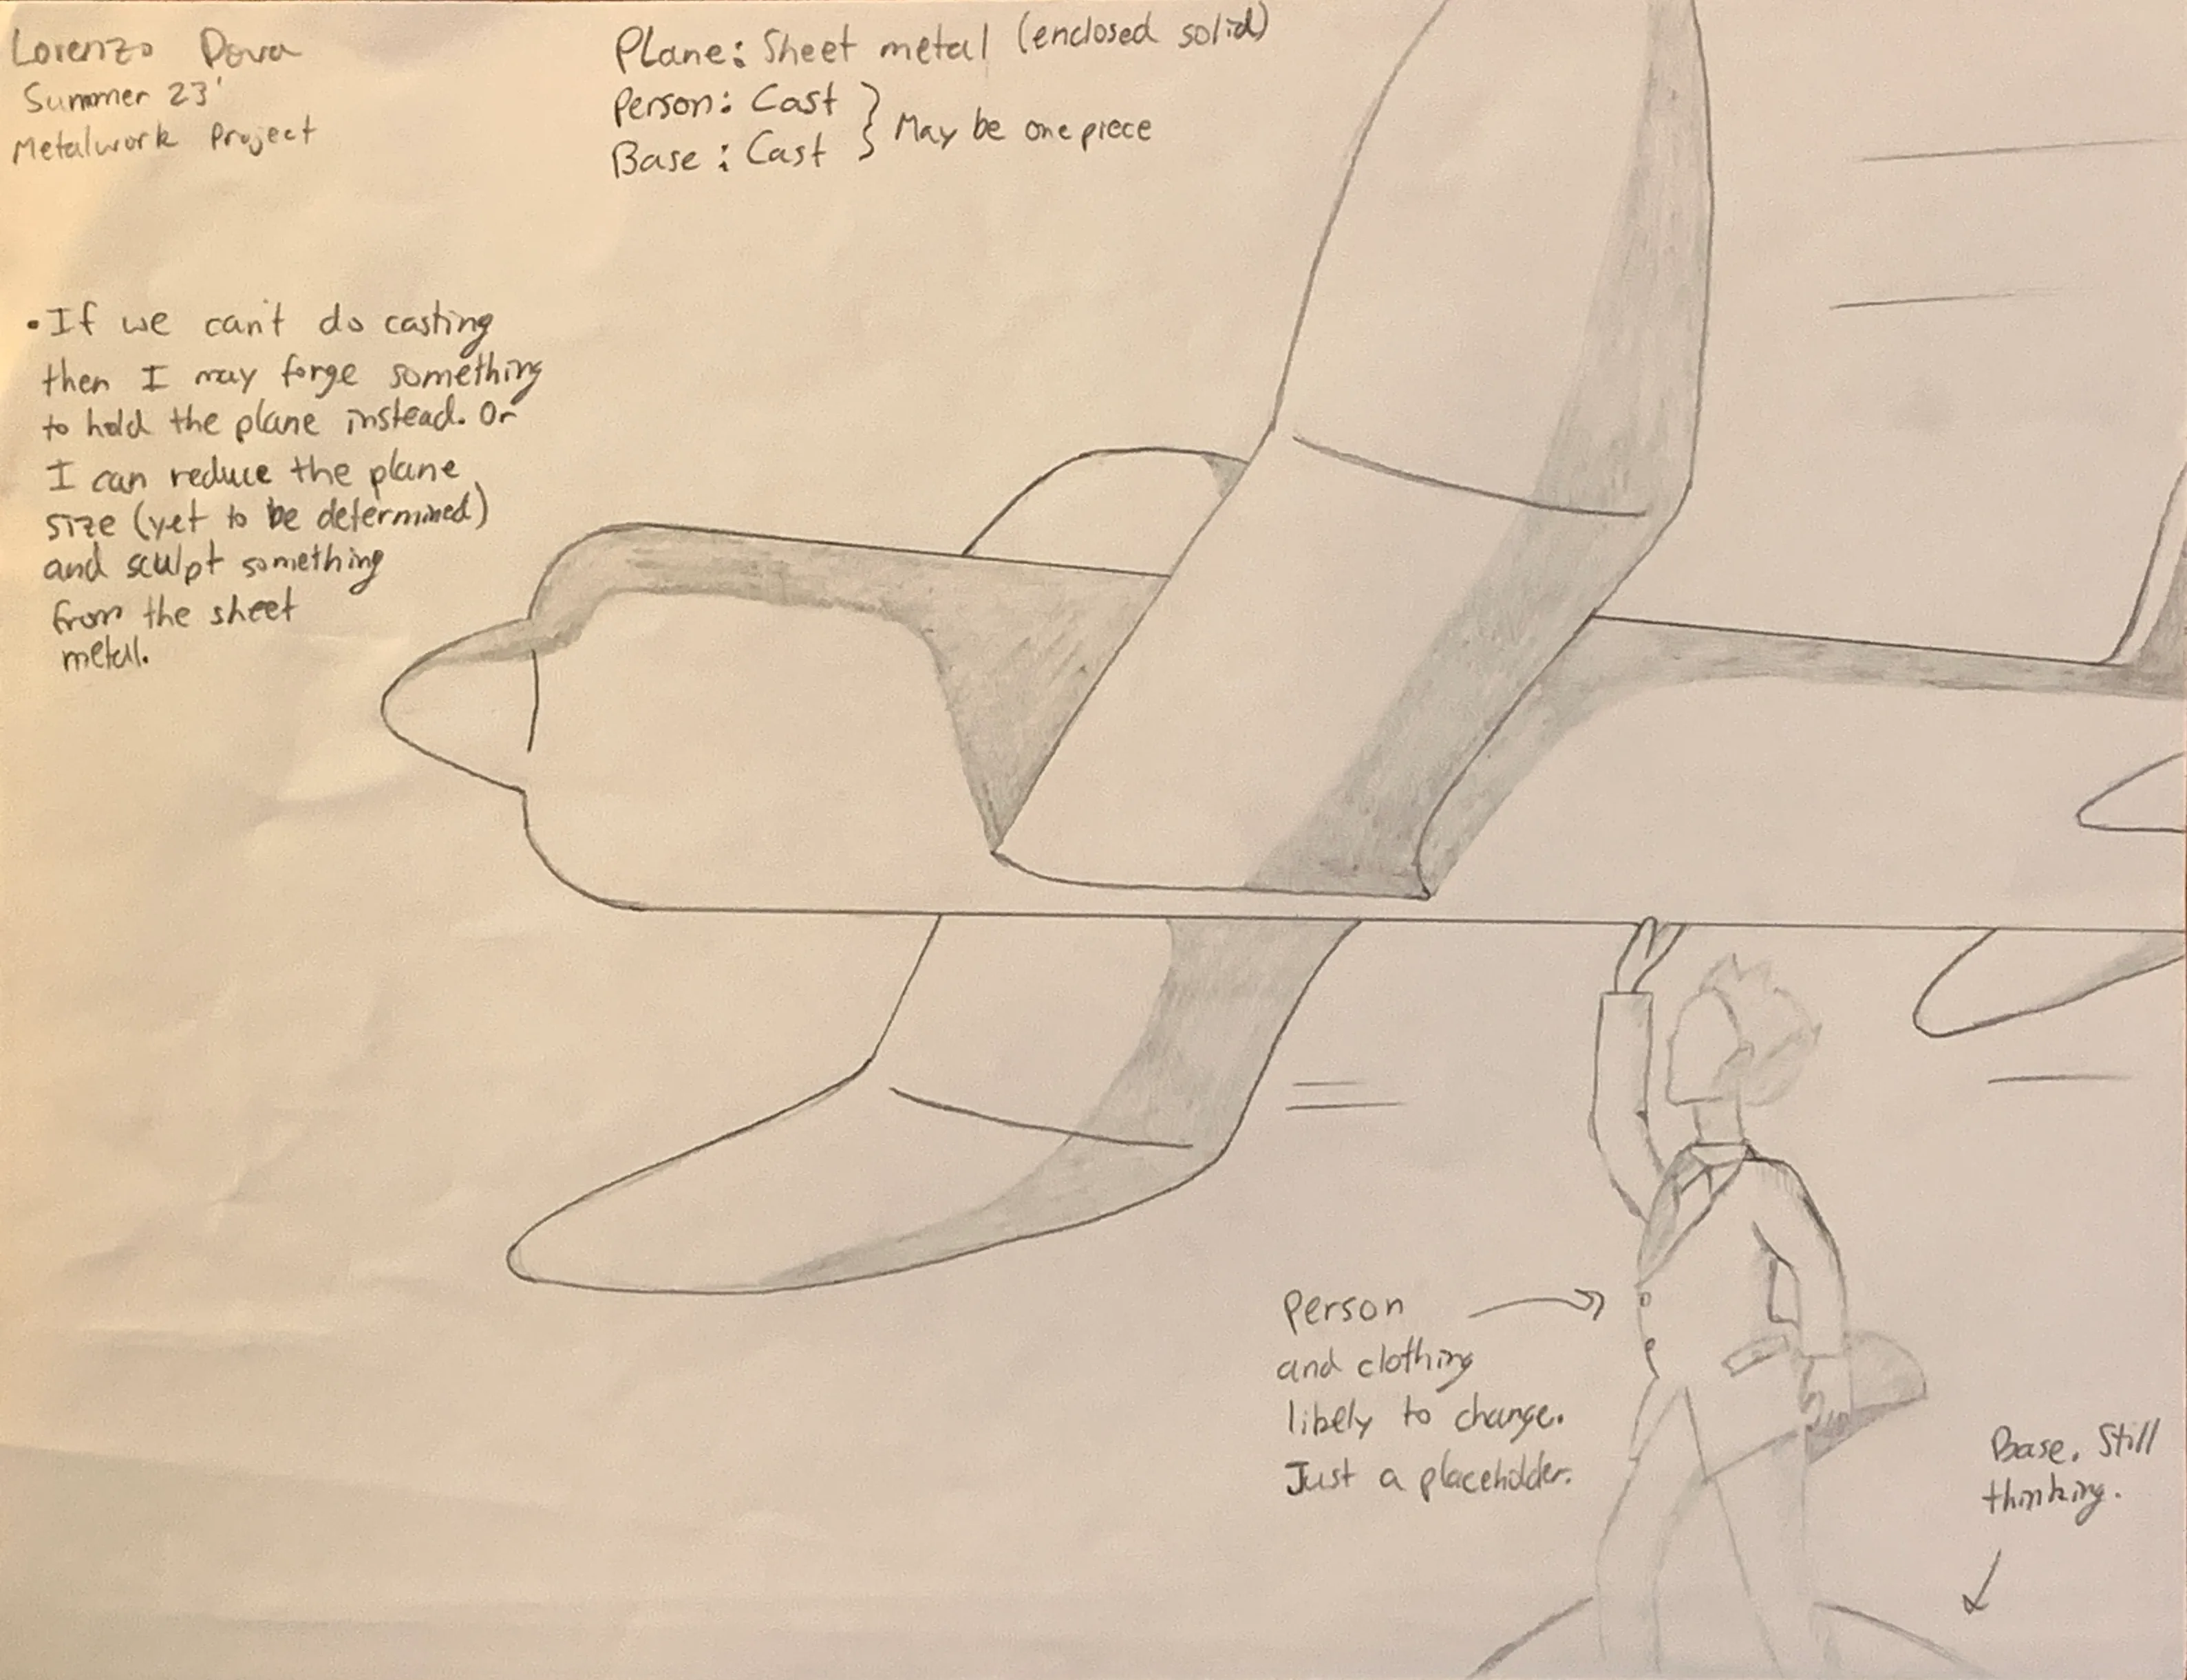
This was my final project for an immersive metalworking summer course at Massachusetts College of Art and Design. I was inspired by the film “The Wind Rises” by Hayao Miyazaki, which depicts an imaginary predecessor to the Mitsubishi A5M inverted gull wing airplane. Using both a cold hydraulic press and traditional hot forging techniques, I carefully shaped each piece by hand. I am glad that I had the opportunity to blend both the precision of engineering with artistic design for this sculptural piece.
*** More info below: This will be moved to a separate page as the scroll is wonky
The first image, a sketch, shows original intent to make both the airplane and a human figure to hold the airplane. My hope was to cast the human figure and base out of bronze, but unfortunately there were unforeseen issues that didn't allow for casting. I feel that bronze sculptures evoke a type of sturdiness, and that there would have been an interesting juxtaposition between the different metals.
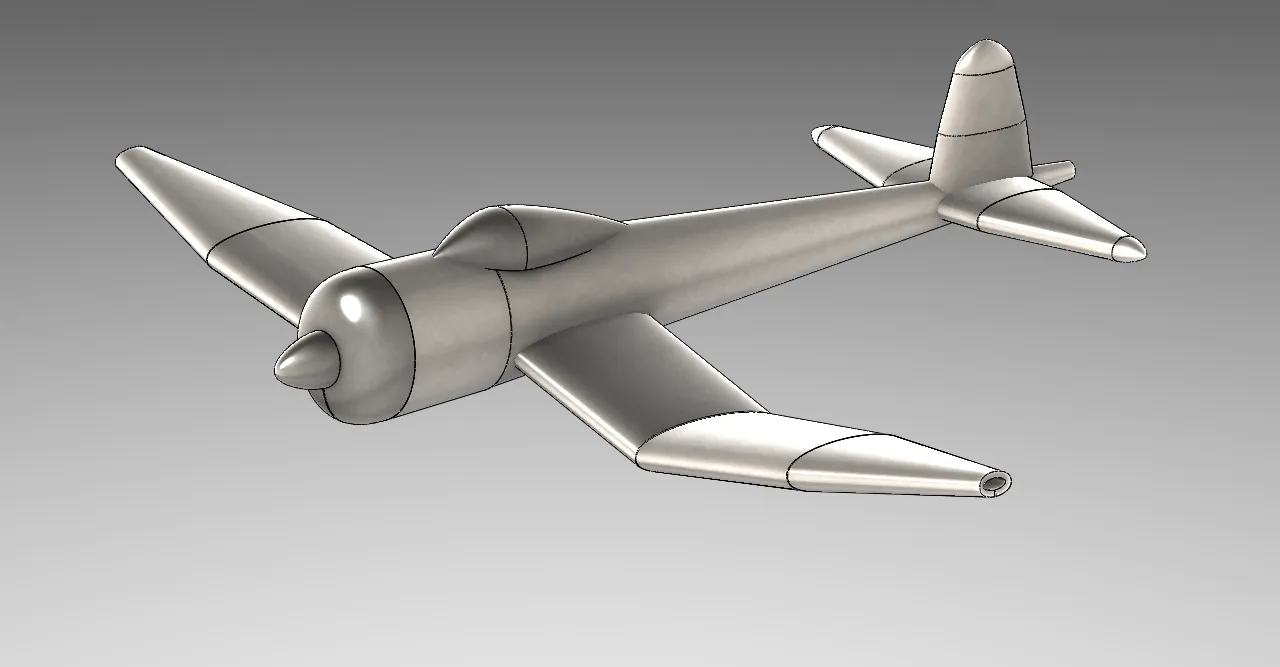
I crafted a cardboard model to gauge the sizing of the airplane, and to further encourage the ideation process. This helped me to understand the scale to which I would make the airplane, and what my metal sculpture would try to replicate. I then created the aircraft in SolidWorks, specifically using the sheet metal features. This allowed me to not only make the airplane in CAD as I wanted, but to unfold each piece to create a 2D drawing file with all the separate pieces. This file was used to precision cut the pieces from sheet metal on a CNC plasma cutter.
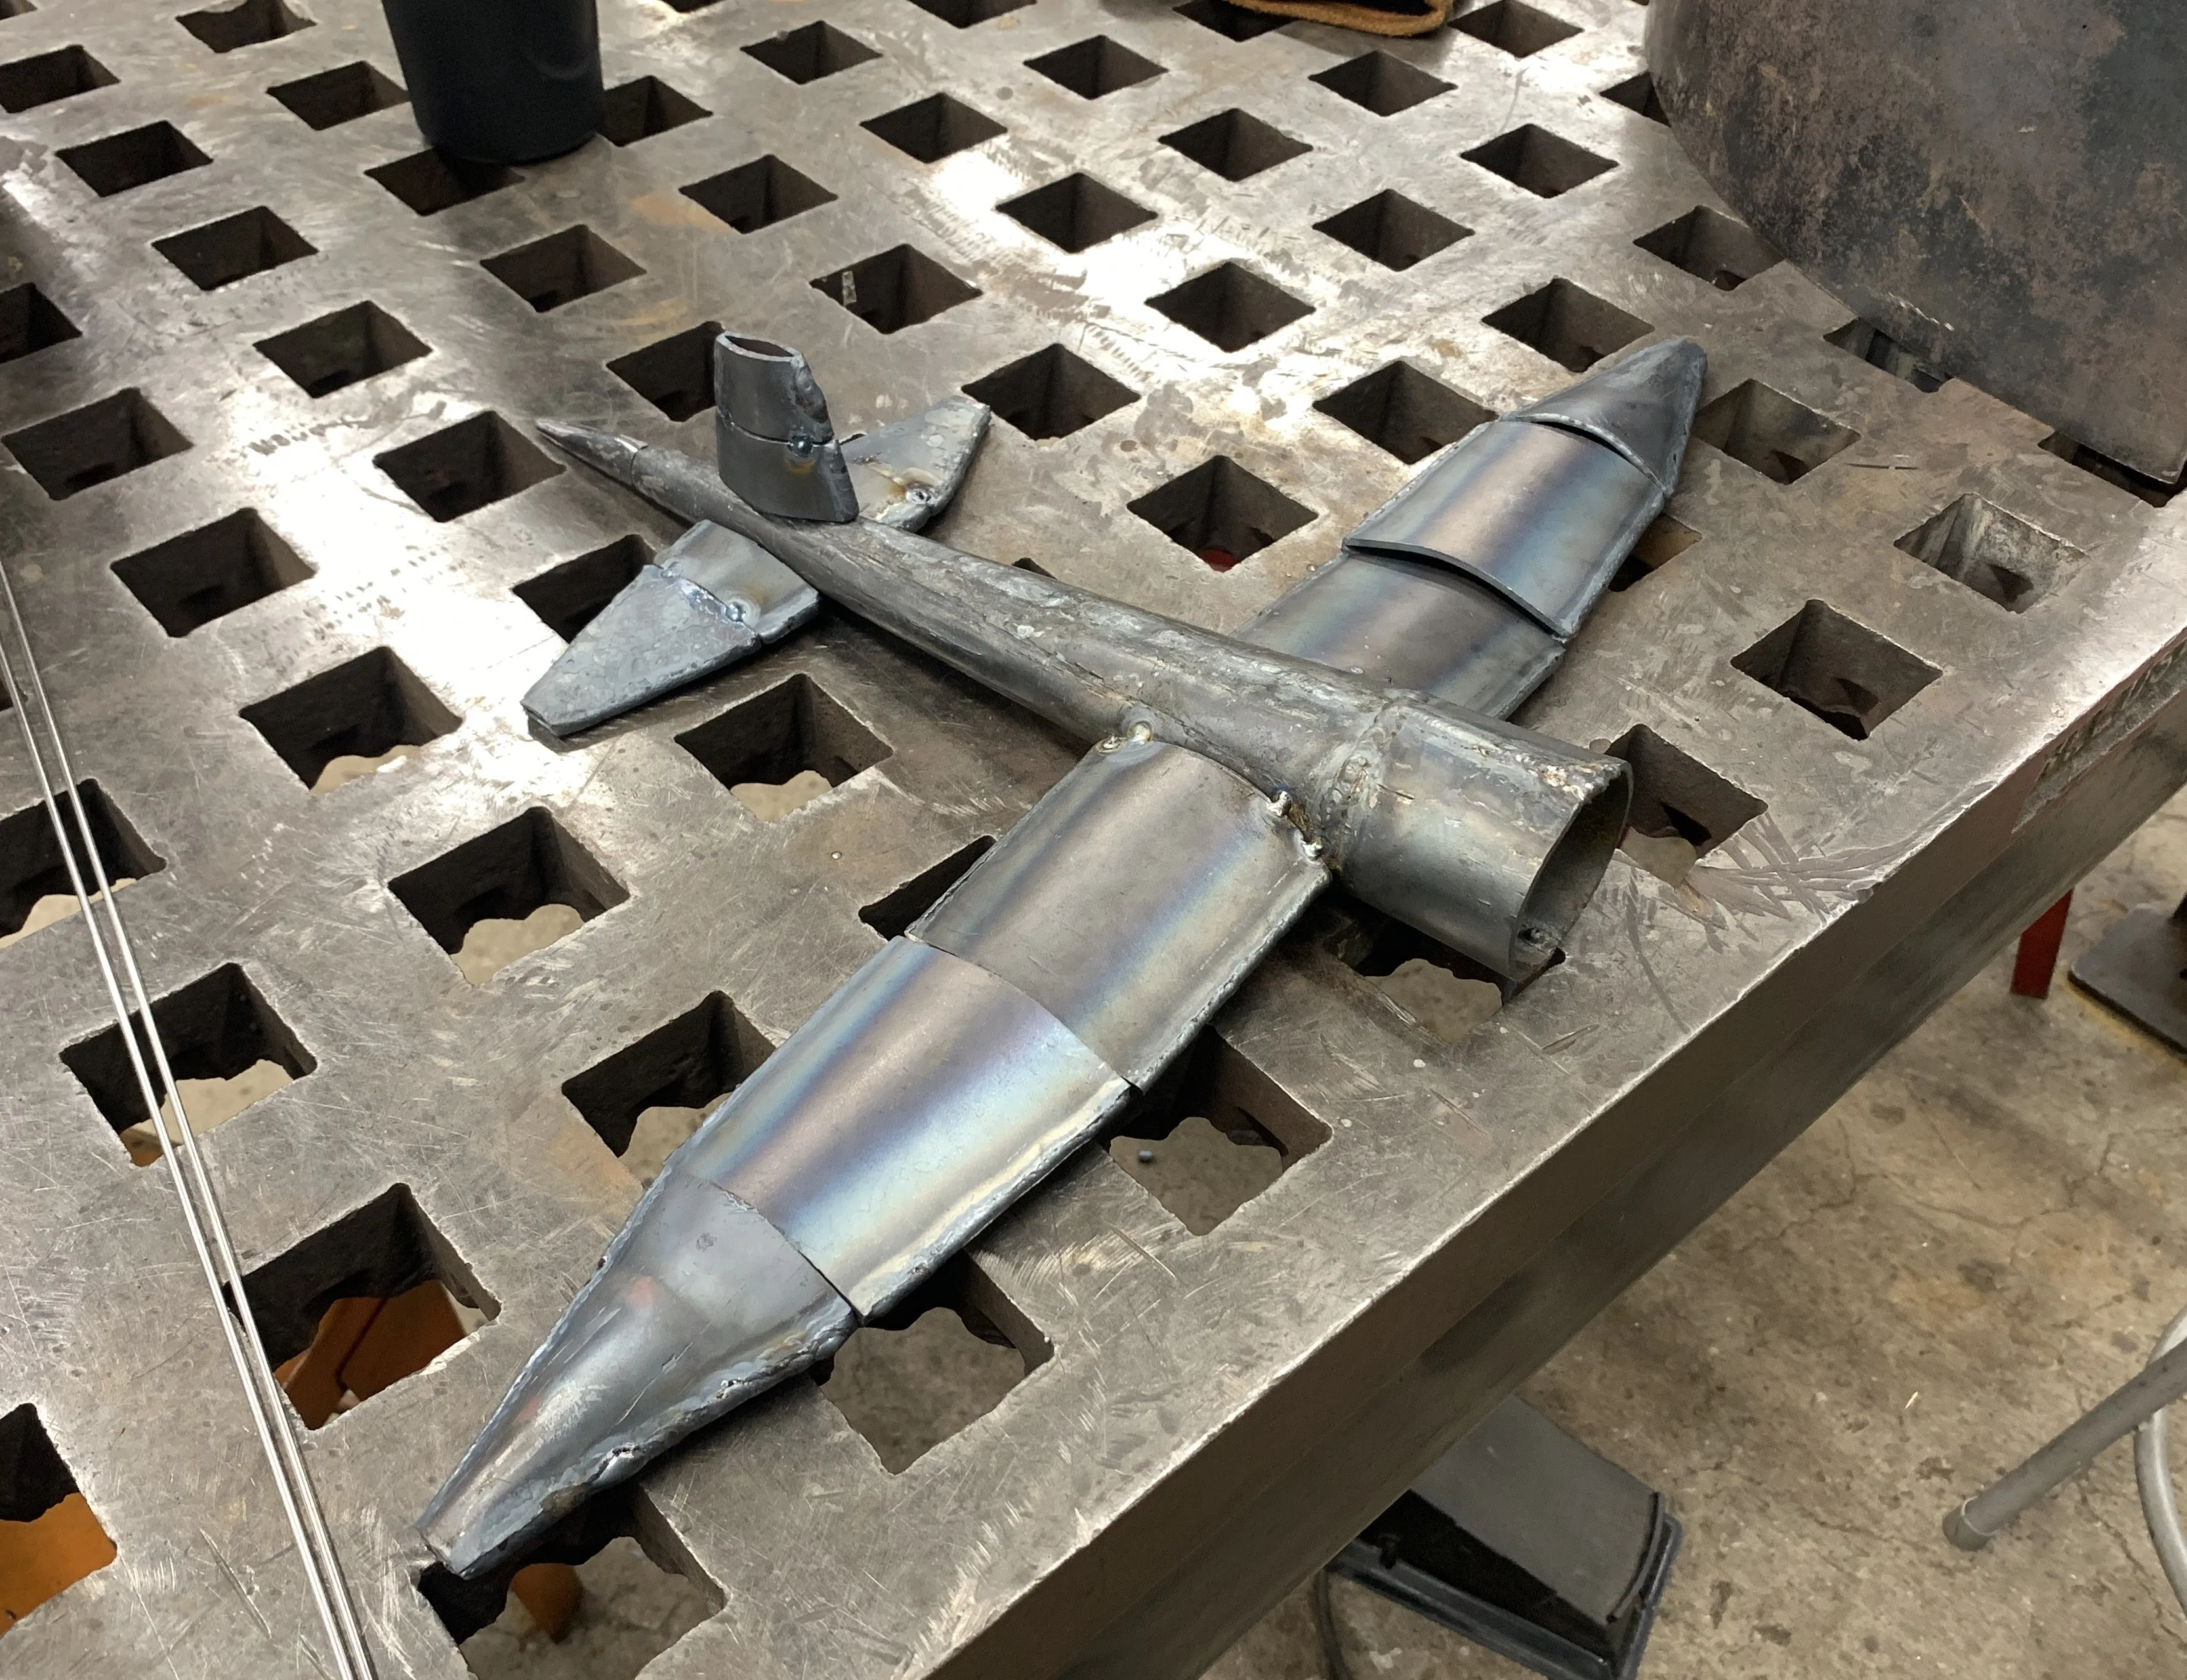
Using both a cold hydraulic press and traditional hot forging techniques, I carefully shaped each piece by hand. The highlight of this project was the hand tempering of the airplane canopy. While it was a happy accident, it provided for an amazing final touch.


Role: Systems Test Engineer, Omnicell
At the height of the COVID-19 pandemic, my team at Omnicell was notified of significant material degradation with the pharmaceutical cabinet drawer handles, resulting in significant cosmetic damage and loss of functionality. This project swiftly became my primary focus, and by testing chemical cleaning agents on the Omnicell products, I identified which cleaning agents heavily compromised plastic durability.
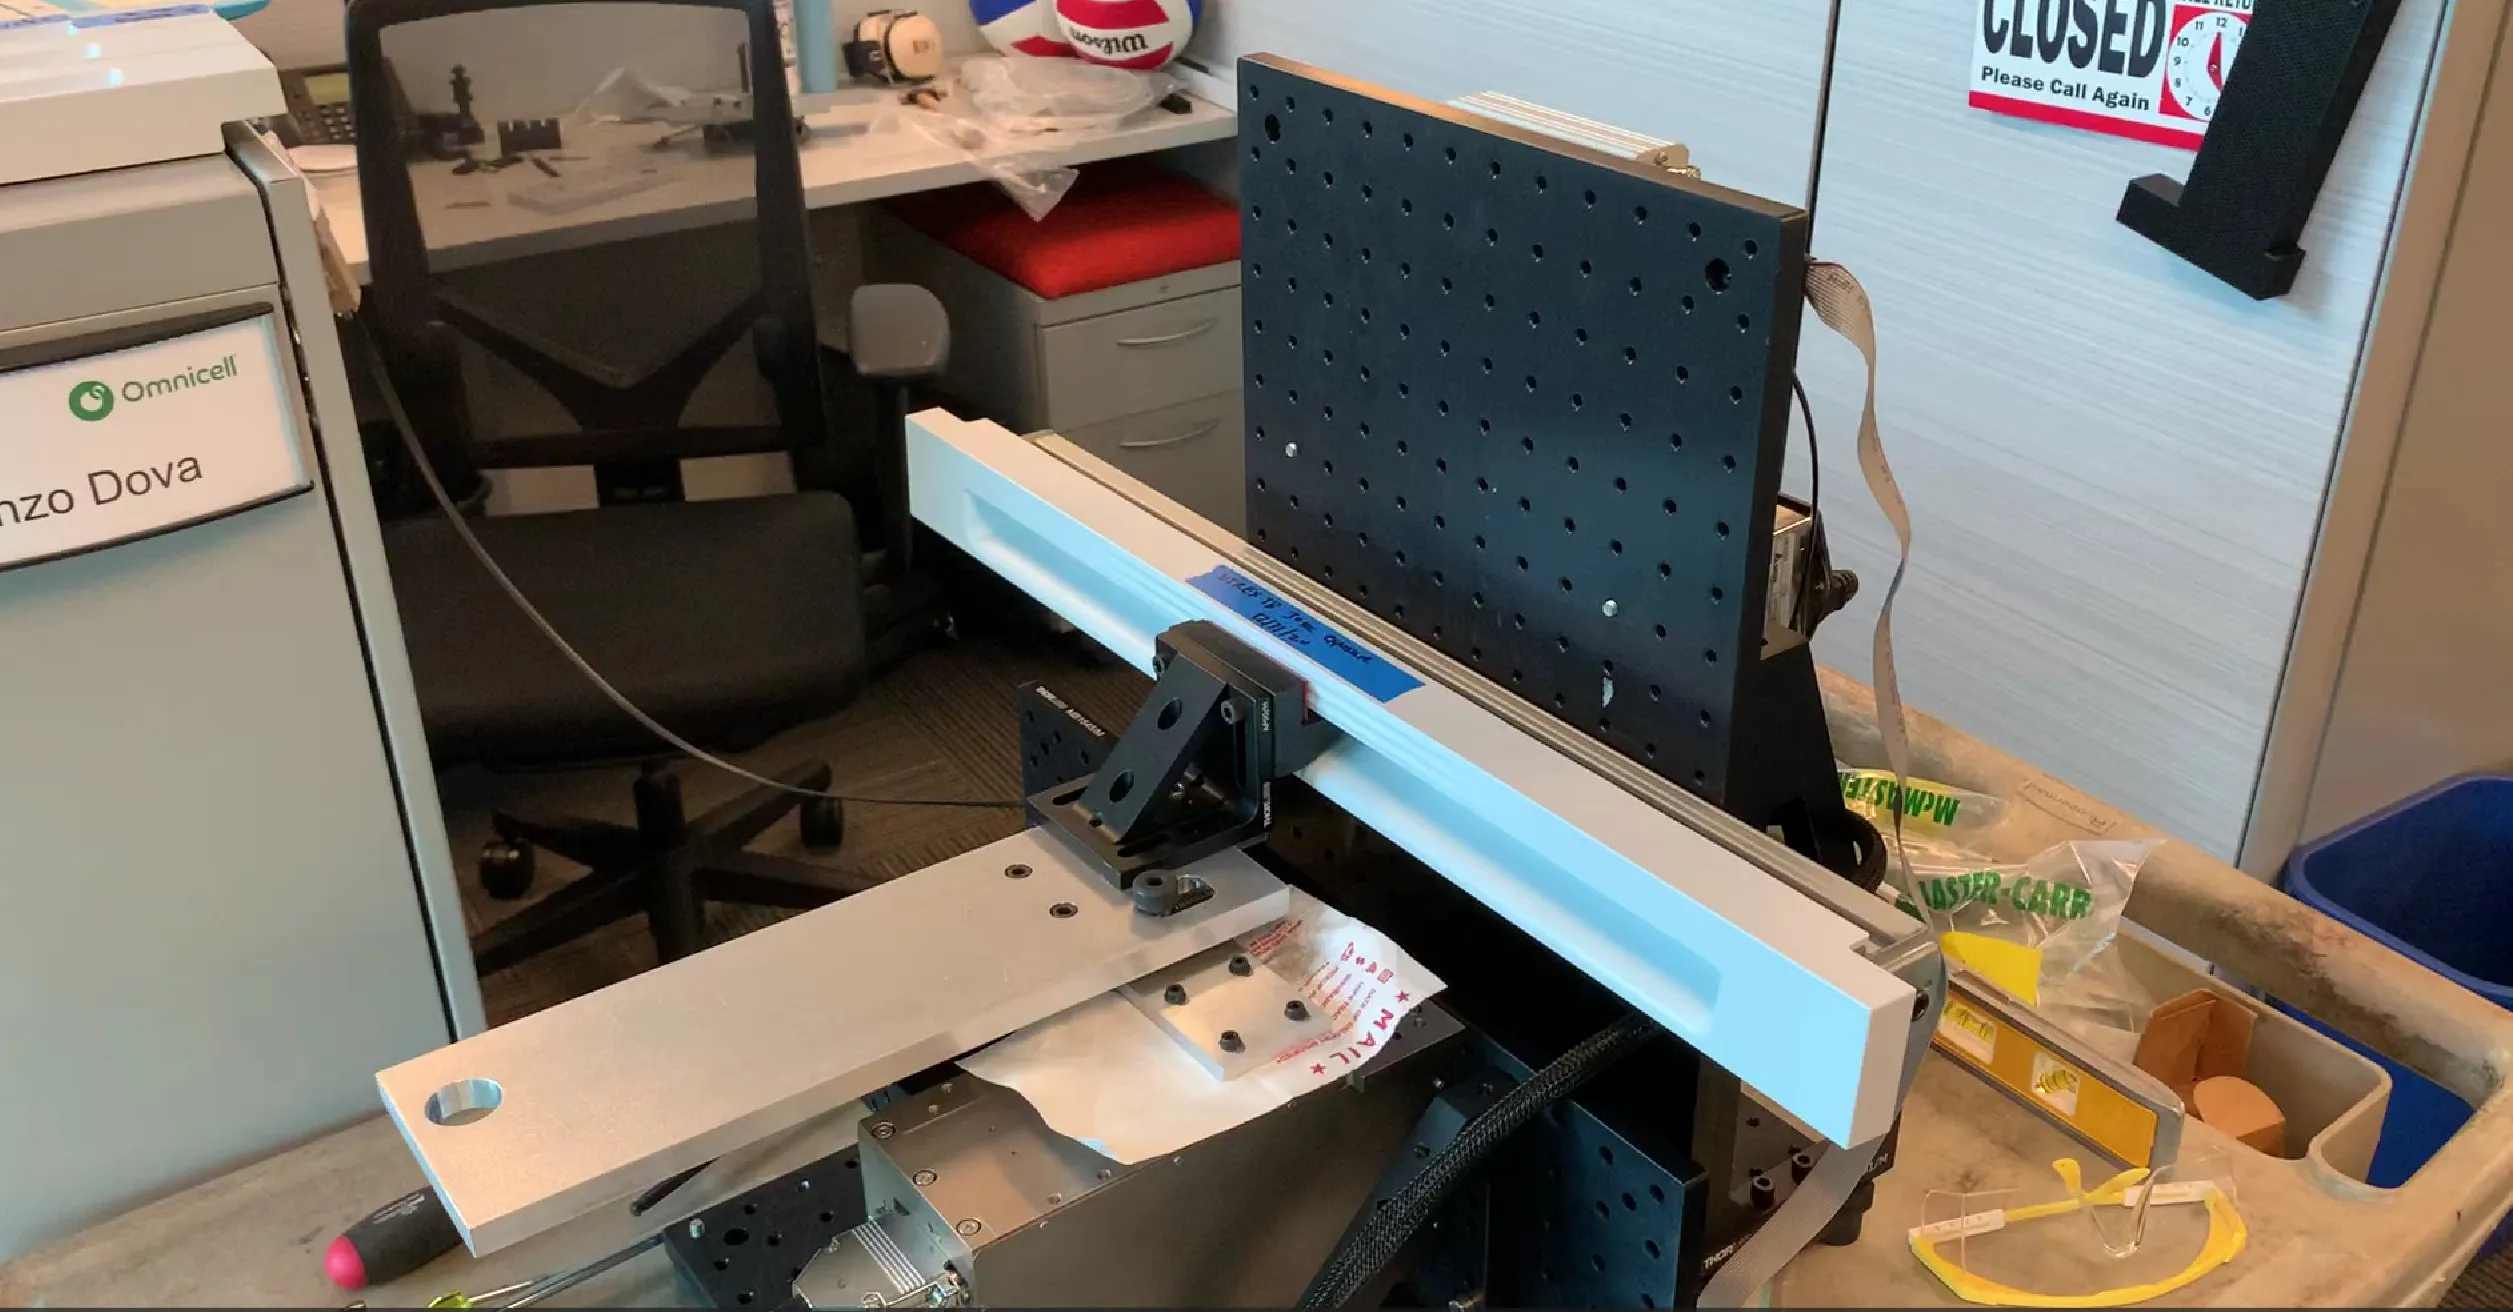
User data was collected utilizing a drawer handle equipped with strain gauges. I used this data to recreate the strain data on the fixture above using the SMAC Moving Coil Actuator that provided precision control and enabled accurate recreation of a user's interaction with a drawer handle. I programmed the SMAC using the provided GUI and visual programming language. A block was 3D printed in a similar form to a hand, complemented with silicon pads on the digits and palm sections, to simulate the typical human grip during push and pull interactions with the drawer handle.
To validate the efficacy of this fixture, handles were treated with previously identified aggressive chemical cleaners and subjected to a reliability test, ensuring the re-emergence of the earlier observed defects. Finally, I devised a thorough training curriculum and an operational guidebook, subsequently entrusting this test fixture to a senior design engineer. This fixture played a crucial role in assessing and validating novel plastic materials for the drawer handles, ensuring enhanced durability and elimination of chemical failure.

Role: Systems Test Engineer, Omnicell
I developed this fixture to pull on the dispenser tab, a critical component responsible for locking the cassette into the dispenser. Any issues with the tab mechanism would result in the cassette unintentionally releasing a syringe during insertion.
It was important to ensure the pull force on the tab would replicate our users, and adhere to a standard. After extensive research into various standardizations, I recommended a military standard for actuation forces as it was a reasonable benchmark, and was most directly correlated with our project.
About 80% of this fixture was manufactured using a Markforged 3D printer with the Onyx filament. The initial design of this fixture did not include the triangular brace from the solenoid holding pylon to the cassette base, and this proved to be an issue as the solenoid would cause deflection under load. After multiple design iterations, the fixture proved rigid enough to provide a stable base for testing.
A solenoid was chosen to pull on the dispenser tab, as this provide both speed and precision. To calibrate the force that the solenoid would pull, I designed a custom jig utilizing a Nidec-Shimpo force gauge mounted on a manual press with a wheel. The solenoid barrel was attached to the measurement end of the Nidec-Shimpo force gauge, and the press was rotated so that it would pull in the opposite direction of which the solenoid force was acting. Visual markers were drawn on the solenoid's barrel, serving as indicators to achieve the target force range when mounted on the test fixture. This fixture was designed prior to my introduction to the SMAC Moving Coil Actuator, which would have proved to be a better system for this fixture.
All these components were integrated with an Arduino Mega and I wrote the code to ensure successful operation. A micro switch and photo interrupter sensor were integrated near the pull tab to provide fine-tuning and confirm successful engagement and disengagement of the pull tab.

Role: Hardware Test Engineer, Omnicell
I designed this test fixture that emulated continuous lifting and dropping of cassettes into the dispenser base. This setup was set to test the worst-case scenario of a pharmacy technician dropping the cassette and was pivotal in determining the cassette's longevity through numerous removal and insertion cycles.
Each cassette had tubular steel attached to the top, with holes drilled to reduce weight. These were necessary to allow the linear actuators, with electromagnets attached to the end, to lift and release the cassettes at the appropriate times. I designed and created several unique parts, utilizing a Markforged printer and the Onyx composite-based material.
There were two key sensors in this fixture, one to track the cassette's position and another to identify any unintentional syringe dispensations from the bottom of the cassette. I performed maintenance after 100,000 cycles and implemented preventative measures after testing each set of three cassettes to ensure proper testing for each batch. In collaboration with my electrical engineering teammate, we employed an Arduino Mega to control the system with motor controllers and relays.
As a result of this testing, it was found that the syringe retention mechanism was not adequate in the case of extreme usage. This mechanism went through multiple design iterations, which were all tested on this fixture, to verify that no syringes would drop out unintentionally.

